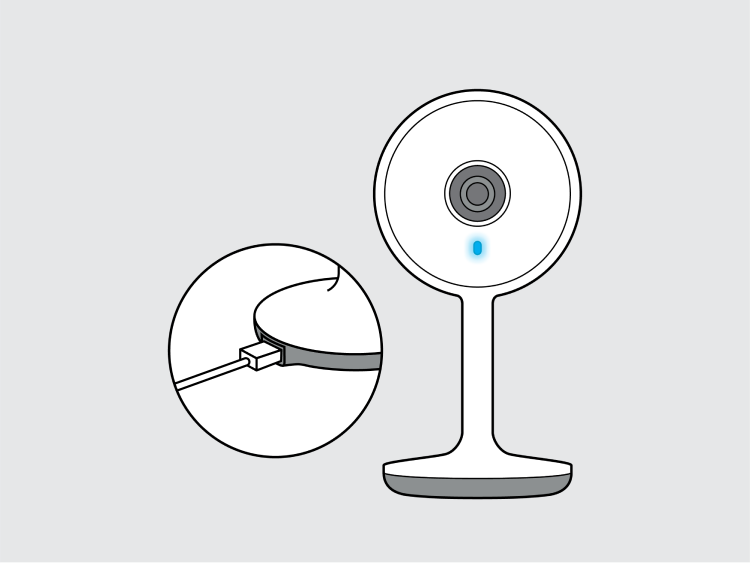
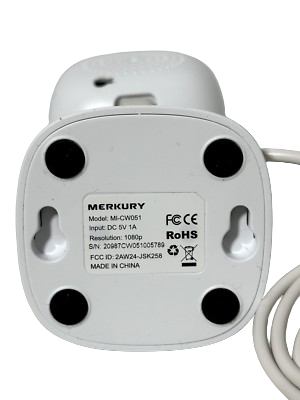
Confirm power supply status, LED indicator states, and device serial identification.
ADVERTISEMENT
⚡ Part 1: Power Initialization & Status Light
Connect your camera using the certified 5V power adapter. Check the front indicator light to determine the current operational status.
Tap your camera LED light status to check readiness:
✅ Ready for Pairing: Rapid flashing indicates the camera is in wireless discovery mode and ready for Wi-Fi configuration in Step 2.
ADVERTISEMENT
🔍 Part 2: Device Serial Number (SN) & QR Location
Every smart camera has a unique 12-to-16 character alphanumeric Serial Number (SN) or QR Code used for secure cloud registration.
Where to Locate Your Device Serial Number:
Camera Base / Back Sticker: Printed directly underneath the camera stand next to the QR code.
Original Packaging Box: Listed on the barcode label as S/N: XXXX-XXXX-XXXX.
Router Connected Client List: Displayed with the hardware MAC address in your Wi-Fi admin panel.
🛠️ Power & Hardware Safety Guidelines
Certified Power Source: Always use the original 5V / 1A–2A micro-USB power brick. Underpowered USB ports on computers or unpowered hubs may cause continuous reboot loops.
Physical Reset Hole: If the LED light is unresponsive, locate the reset hole on the bottom or back of the camera, insert a reset pin for 10 seconds until you hear the chime sound.
Security Advisory: Keep your camera serial number private to prevent unauthorized pairing requests on public networks.